Add/Delete Cases in a Table
The index column shows the number of the row in a case table. It is used to reference a location in the dataset.
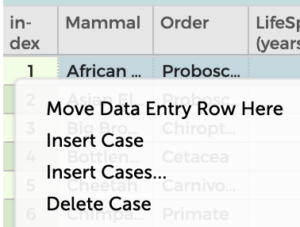
- To enter a new row, click on a number in the index column. Click on “Insert Case.” This will allow you to enter rows in a case table.

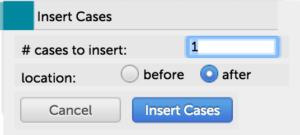
- To enter multiple rows in a case table, click on “Insert Cases” from the index column menu. Select the number of cases to insert and the location. Press “Insert Cases.”

- The simplest way to delete cases is to click on the trash can icon in the inspector palette to the right of the table, which gives you the options to “Delete Selected Cases” (deletes the case or cases you have selected–see here on how to select cases in a table), “Delete Unselected Cases” (deletes all the cases that are NOT selected), and “Delete All Cases” (deletes all cases in the table). Use caution with deleting cases, as this action can only be done by hitting the “Undo” button in the toolbar directly afterwards. For something less permanent than deleting, you may want to set aside cases in the table.
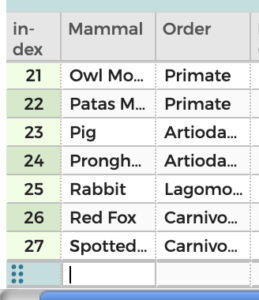
The bottom row of a case table is an editable “Data Entry Row.” Double click on a cell in this bottom row to add/edit the data. Press “Tab” to advance/enter data in the next column (or click on the cell you want to add data to). If you are in the last/right-most column of the row and press “Tab,” a new data entry row will be added directly below.

The data entry row can be dragged to a different position in the table if you wish to enter data there (click on the dots on the left of the row and drag and drop the row where you want it). You may also move the data entry row to a different spot in the table by clicking on a number in the index column and selecting “Move Data Entry Row Here.” The row will be moved to directly above the index number you clicked on. If you tab through all the cells in the row and press “Tab” again, a new data entry row will appear directly below the row you just entered data in (not at the bottom of the table).