Introduction to Tables
Get Started with Tables
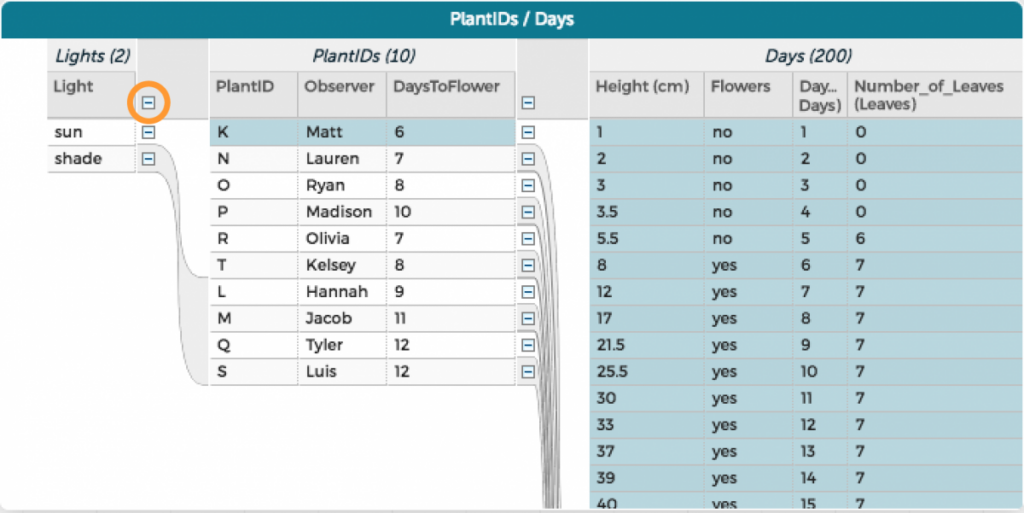
- CODAP’s tables display parent-level data on the left-hand side and child-level data on the right.
- Change column widths by dragging the separators between titles in the column header.
- Click on a column header to edit the name or formula of an attribute.
- Click on parent or child data rows to highlight associated data within CODAP.
- Collapse and expand child case (data) tables by clicking the plus (+) symbol next to the left-hand table rows.

- Click on the ruler icon in the table inspector panel to the right of the table to add new attributes, delete selected cases, and more.
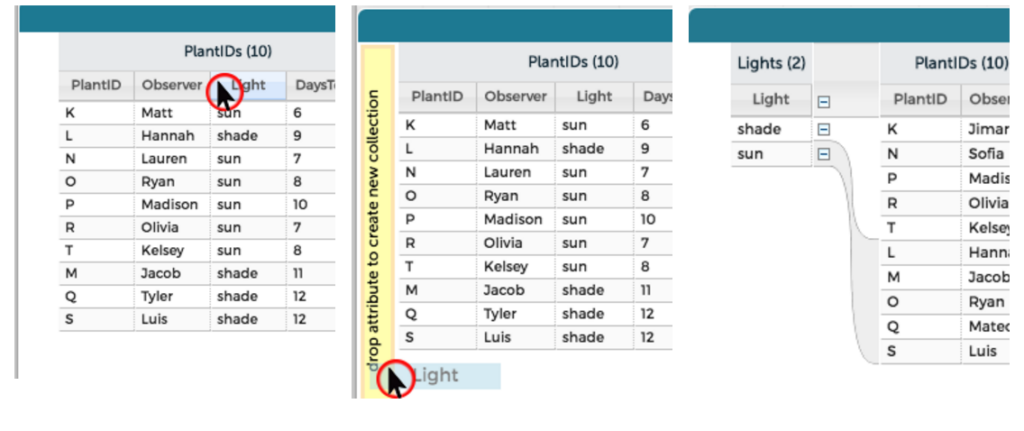
- Drag and drop an attribute (left screenshot) to the far left side (center) to create a new collection (right).

Table inspector palette icons
The table inspector palette appears to the right of your table when you select it (click on it).

Dataset Information: This icon allows you to add/edit/view dataset source information, as described in more depth here.
Resize columns: Clicking this icon automatically resizes the columns in the table to fit the data (for example, if a column is too narrow to show the text in it, resizing makes the column wide enough so you can read the full text).
Trash: Clicking on this icon gives you options to permanently delete cases from your dataset, as described here.
Eyeball: This icon allows you to set aside cases in the table and restore set aside cases (a less permanent option than deleting cases), as described here.
Ruler: Add attributes to your dataset. Note that it is also possible to add attributes to your dataset/table by clicking on the plus sign in the top right corner of the table. Adding attributes to a table is described in more detail here.
One thing that is unique about tables in CODAP is you can quickly/easily switch between viewing the data as a table vs. as case cards–see How to Switch From Table to Case Card View for more details.